In the part 1 of this blog post series, we have installed the Management Agent. Now it’s time to add the database. For this case an agent plug-in has to be installed first before we can configure the database.
More information about the management agent administration: https://docs.oracle.com/en-us/iaas/management-agents/doc/management-agents-administration-tasks.html
This is a small blog post series
- Part 1 shows the installation of the Management Agent on an on-premises system
- Part 2 describes how to manage this Oracle database in OCI
- Part 3 watches behind the scenes for billing, job execution etc. – coming soon…
My Setup
- An OCI Tenant in datacenter EU-FRANKFURT-1
- An empty compartment called datacenter-kestenholz
- An on-premises database called CDB114, running on Oracle Linux 7
- OCI Management Agent up and running
The goal is to handle the on-premises database in OCI. Output from the Trivadis TVD-Basenv(TM) framework which show the database up and running:
TYPE (Cluster|DG)  : SID/PROCESS  STATUS      HOME      [2021-02-22 08:05:03]
-----------------------------------------------------------------------------
Dummy rdbms_ee     : rdbms19      n/a         /u01/app/oracle/product/19.0.0/dbhome_1

DB-instance (N|N)  : CDB144       open        /u01/app/oracle/product/19.0.0/dbhome_1

Listener           : LISTENER     up          /u01/app/oracle/product/19.0.0/dbhome_1
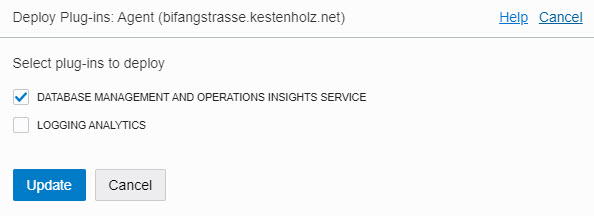
Service Plug-In Deployment
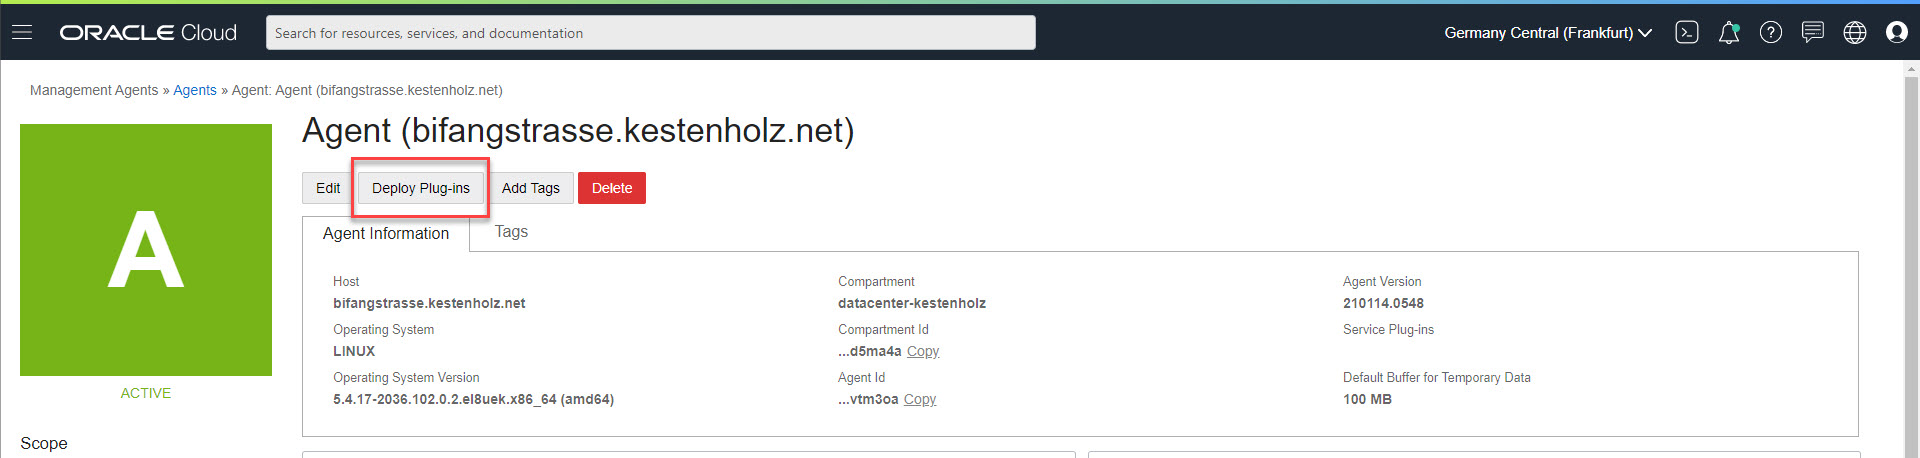
Select the plug-in for the database management, press Update to deploy it on the management agent.
Now you see the confirmation that the deployment process is initiated.

After some seconds, you can see on the top right of the agent overview page, that the service plug-in is installed.

Register the External Database
In External Database menu, we register an external container database first. Be sure that the right compartment is selected.

Set the compartment and display name and click Register.
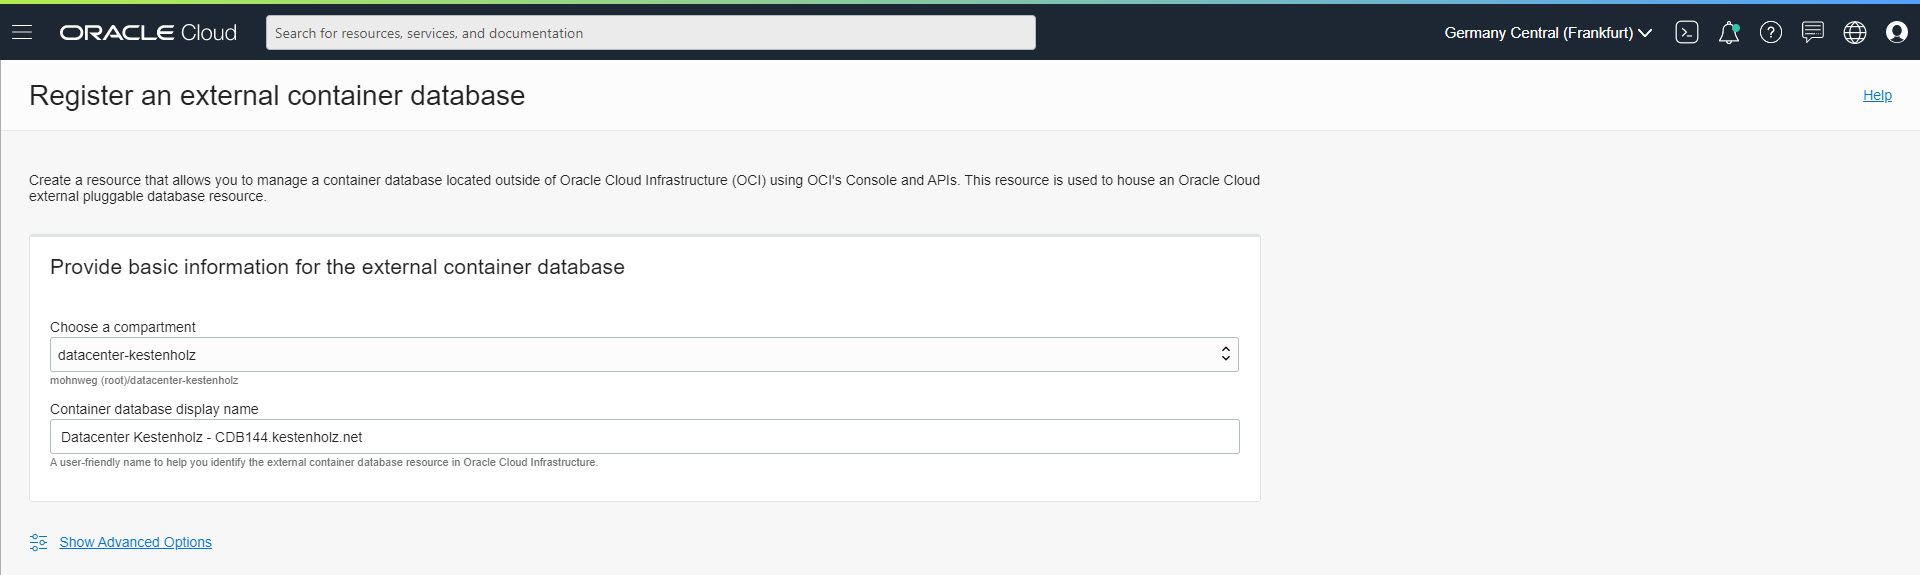
More about this process: https://docs.oracle.com/en-us/iaas/Content/Database/Tasks/externalcreating.htm
Connect to the External Database
After registration, the container database is added, but not connected. In this step we create a connector to setup the database in OCI.
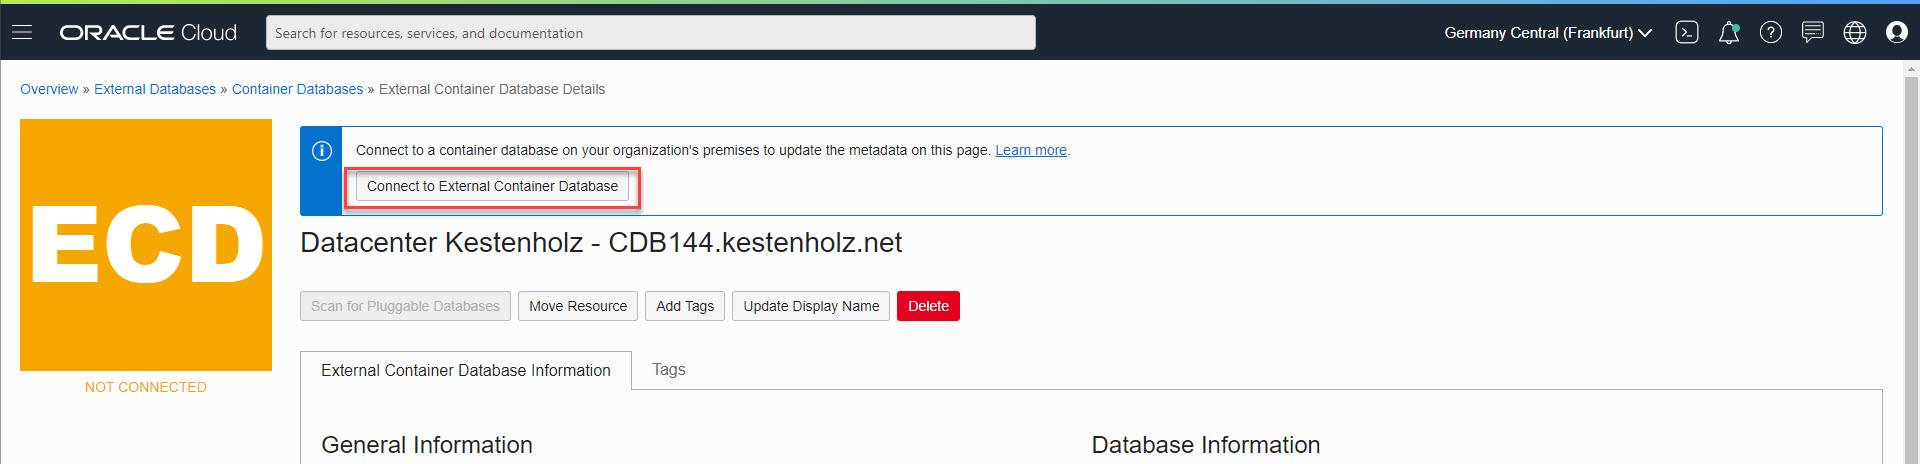
Set display name, DNS hostname, port and service first.
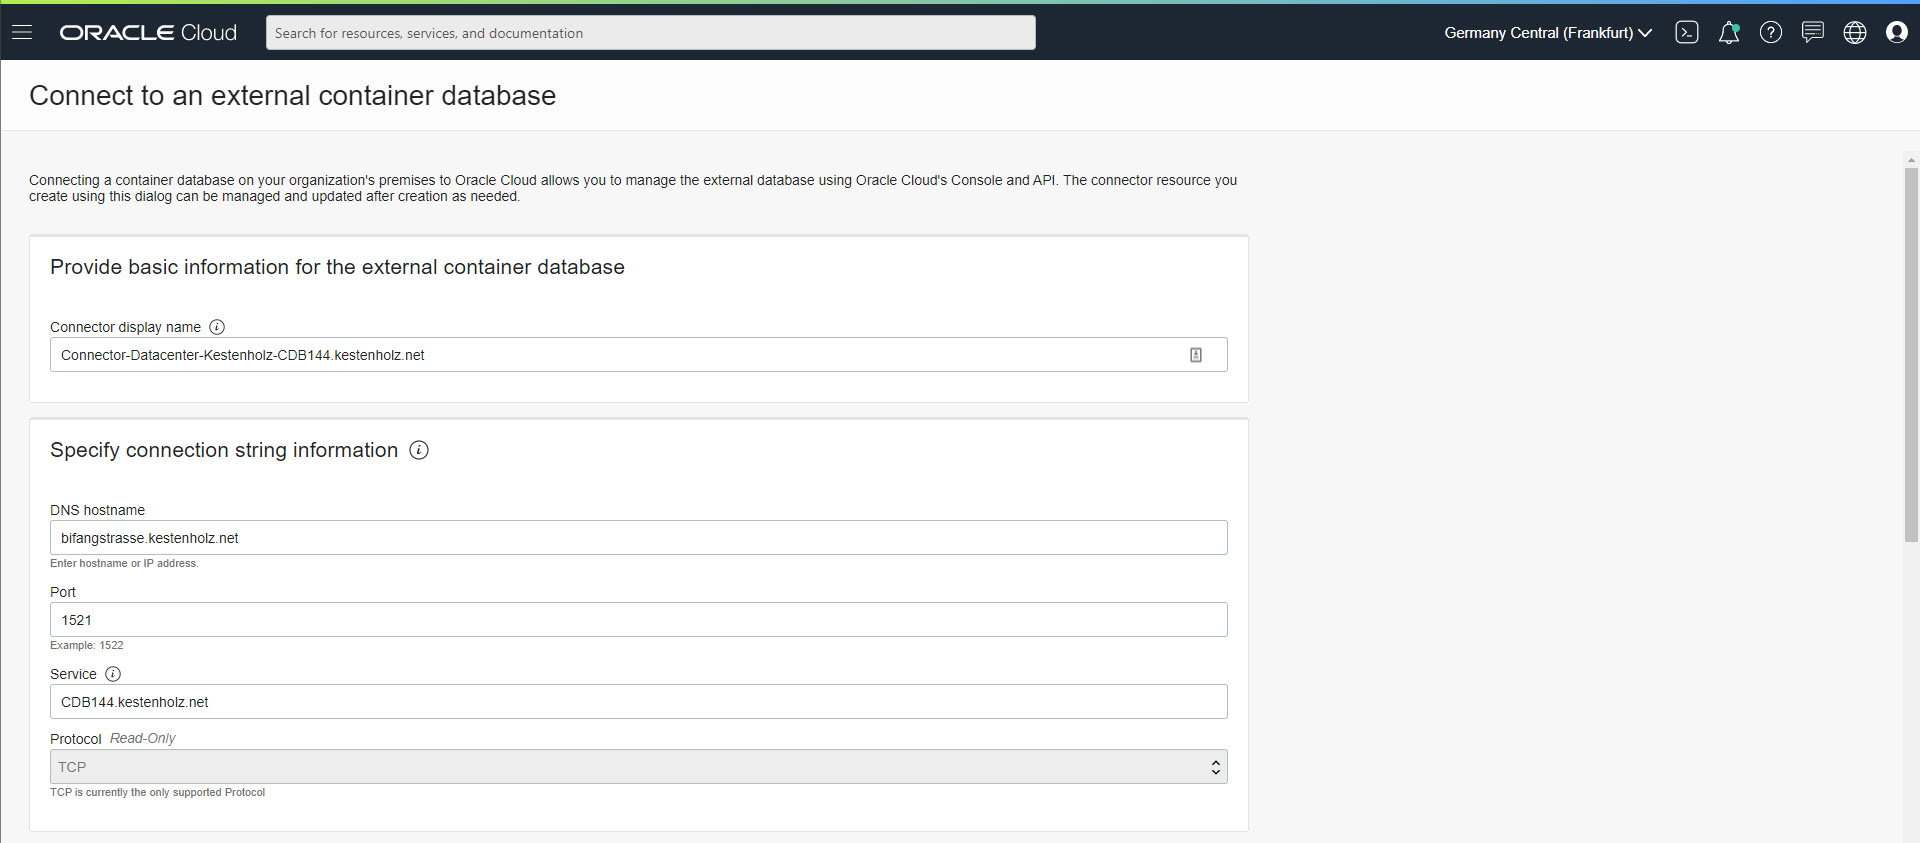
The connector type cannot be changed, select the management agent from the connector agent id list, specify database connection credentials. I use the database schema SYSTEM. Click on Connect to External Container Database.

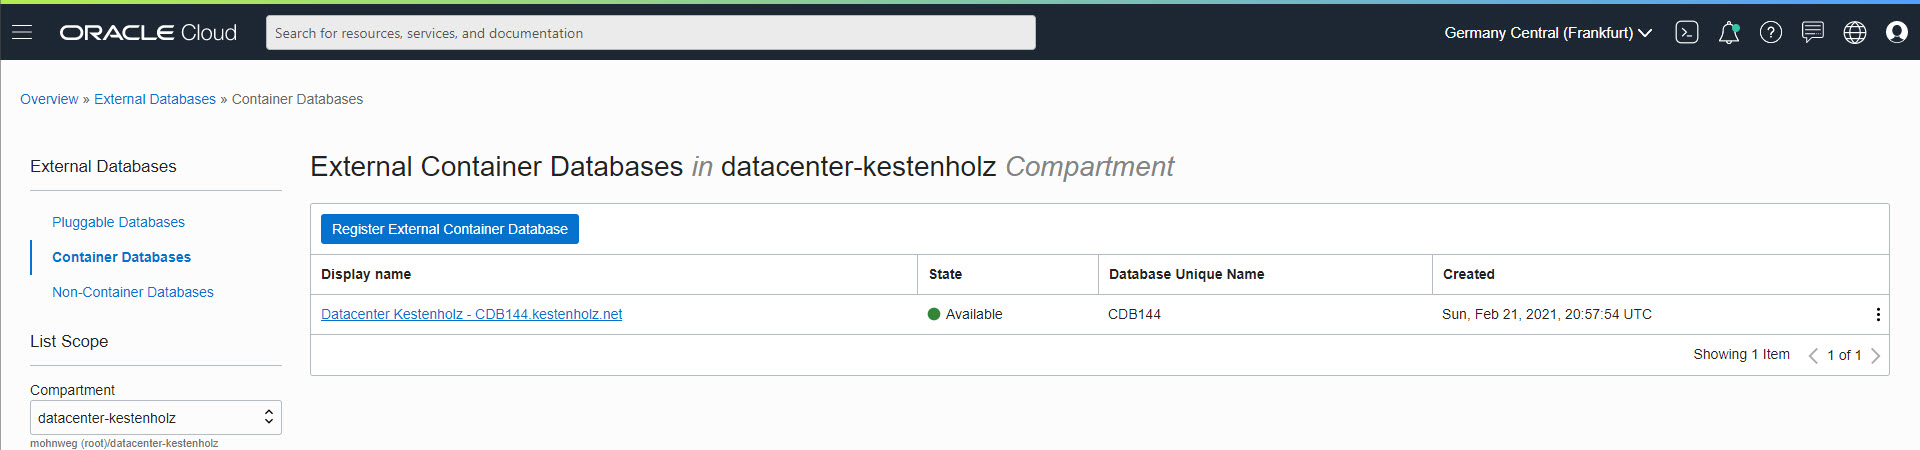
After some minutes, the work request is done and the database is connected. The database is in state Available.
We repeat the steps above to add the three external Pluggable Databases on the same way.
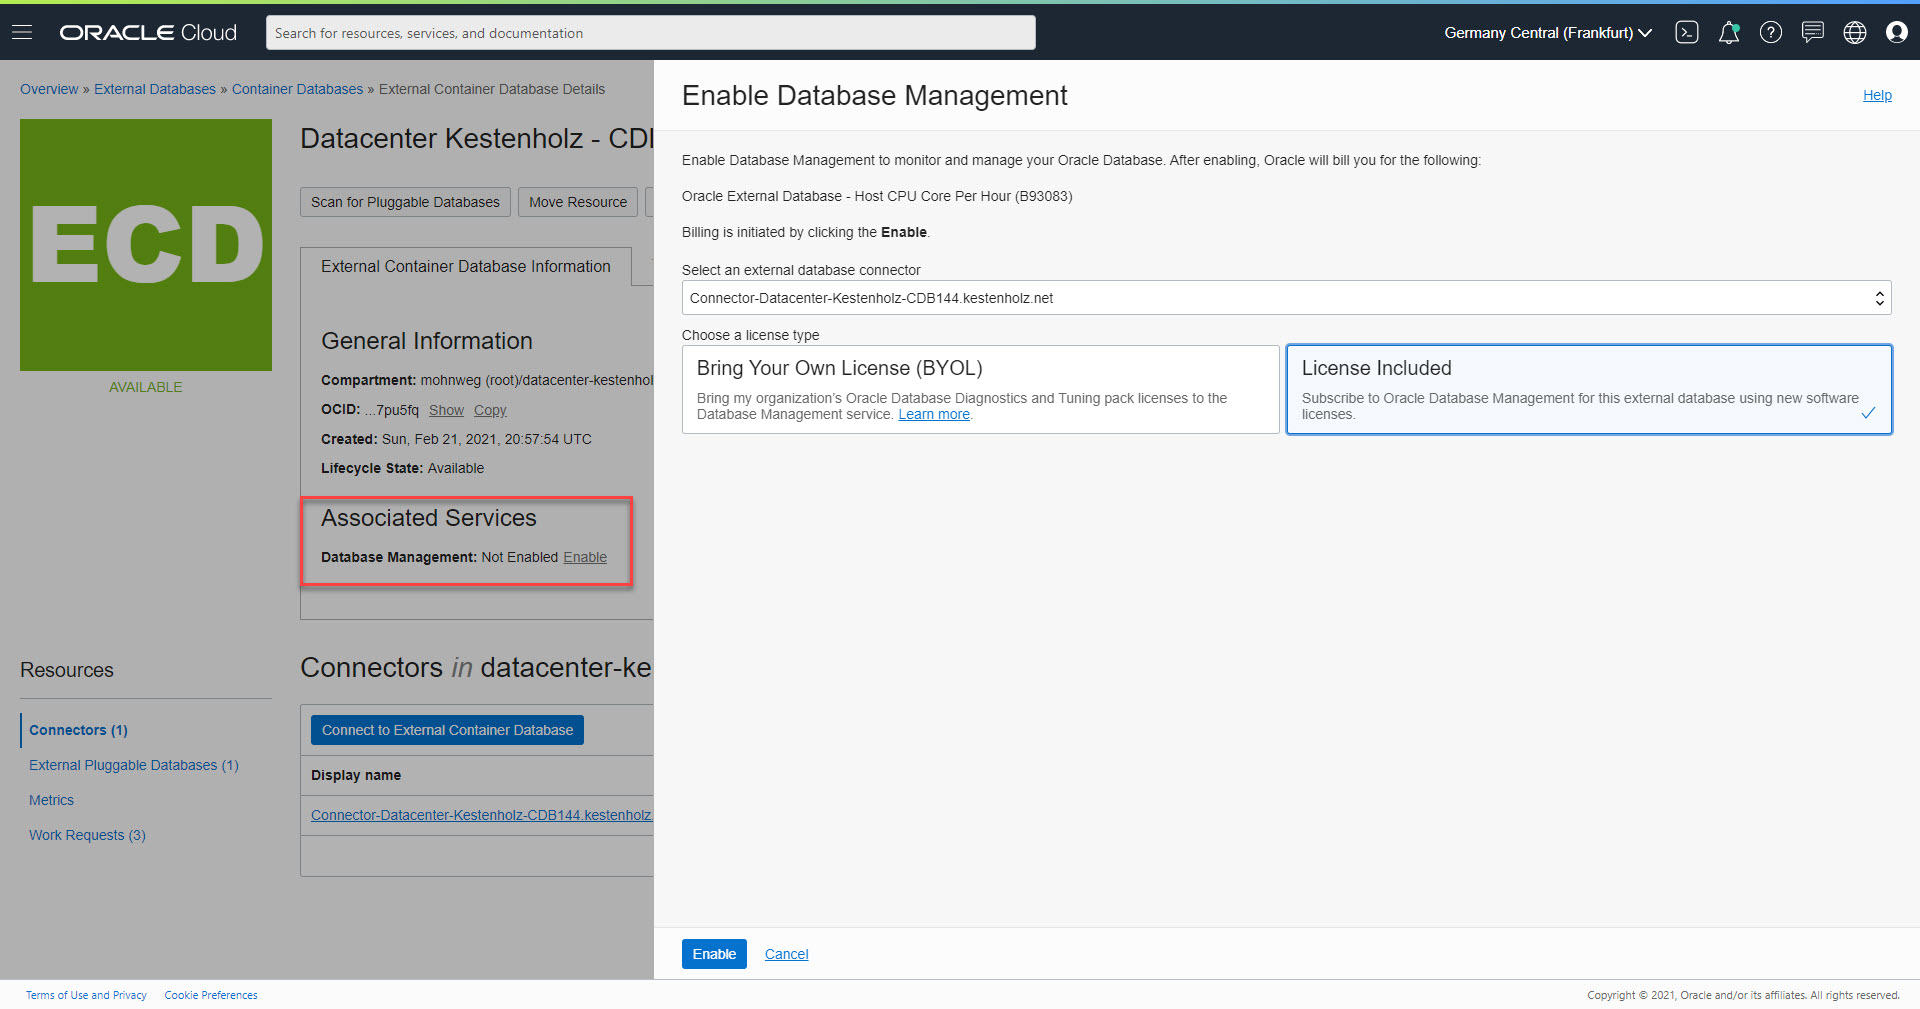
Enable Database Management
Before Database Management from OCI can be used, it has to be enabled. This is done on the page where the external Container Database is visible. According Oracle’s license handling, this has to be done manually. You can select between BYOL and License Included. After some minutes, the database management is enabled and the agent is updated. More about licensing and pricing in the next blog post number 3 which is coming soon.
Database Management – Database Groups and Fleet Summary
When Database Management is enabled in OCI for all Container and Pluggable Databases, the management agent starts to collect database related data. We can organized the external databases in groups.
In Database Management menu, create a new database group. In my case I named it Datacenter_Kestenholz which contains the previous added external databases.


When Database Management is enabled in OCI for all Container and Pluggable Databases, the Management Agent starts to collect database related data. Some moments later, the dashboard has the first values.
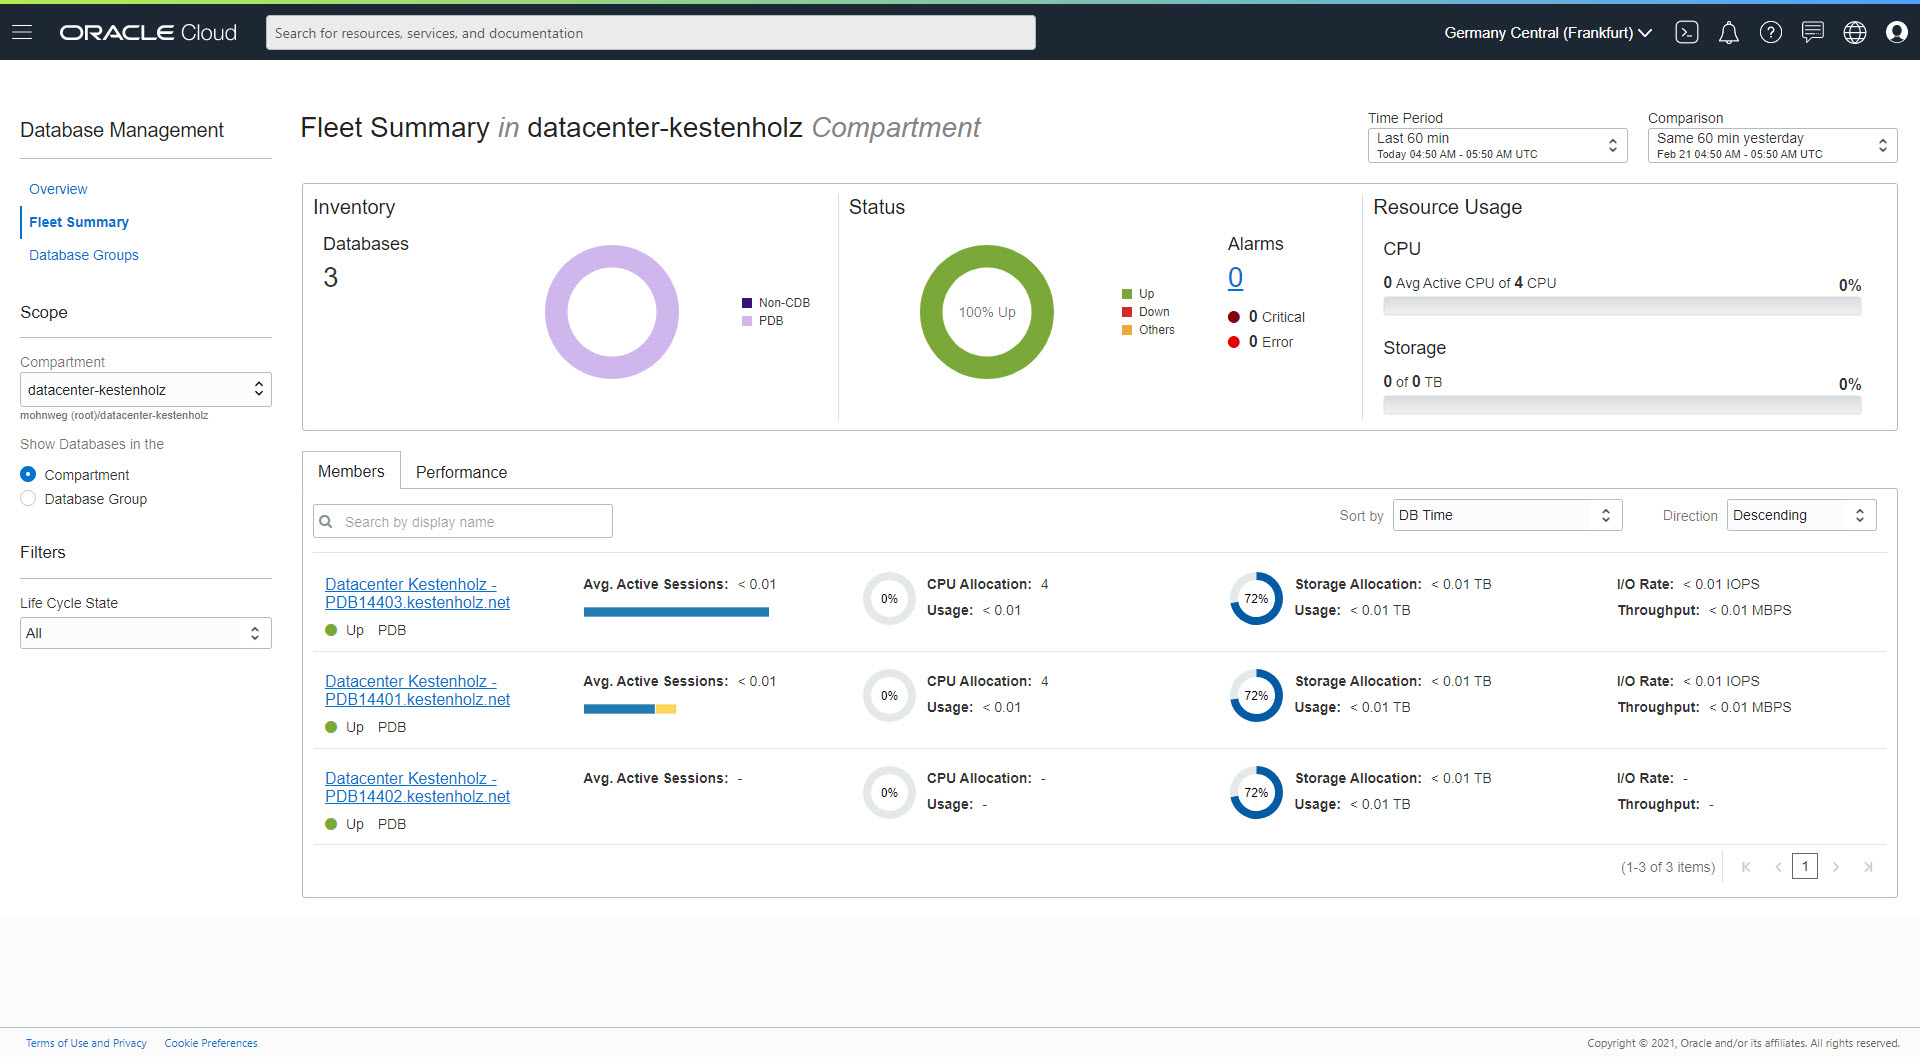
Note: The Container Database is not shown in the Fleet Summary dashboard at the moment, only Pluggable Databases are listed with performance data etc. – I will open a SR to clarify it.
Summary Part 2
When the Management Agent is up and running, adding a database is straight forward. But we have to clarify the license situation first. More about licensing and cost in the next blog post part 3.