In this blog post serie which has three parts, I want to describe how data will be uploaded from an on-premises environment into the Oracle Autonomous Transaction Processing database Oracle Data Pump.
- Part 1: Creation of the ATP database and connection verification
- Part 2: Export of on-premises data with Oracle Data Pump and move into into the Oracle cloud
- Part 3: Import of data into the ATP database with Oracle Data Pump
Basics about ATP from the Using Oracle Autonomous Transaction Processing User Guide:
Autonomous Transaction Processing is designed to support all standard business applications and deliver scalable query performance.
Autonomous Transaction Processing provides all of the performance of the marketleading Oracle Database in an environment that is tuned and optimized for transaction processing workloads.
As a service Autonomous Transaction Processing does not require database administration. With Autonomous Transaction Processing you do not need to configure or manage any hardware, or install any software. Autonomous Transaction Processing handles creating the database, backing up the database, patching and upgrading the database, and growing or shrinking the database.
This is my setup:
- Oracle Cloud Infrastructure account with an own Compartment
- On-premises Oracle RDBMS 18c EE with HR example schema installed on Oracle Linux 7.4
- Windows 10 64bit client
Creation of the Autonomous Transaction Processing Database
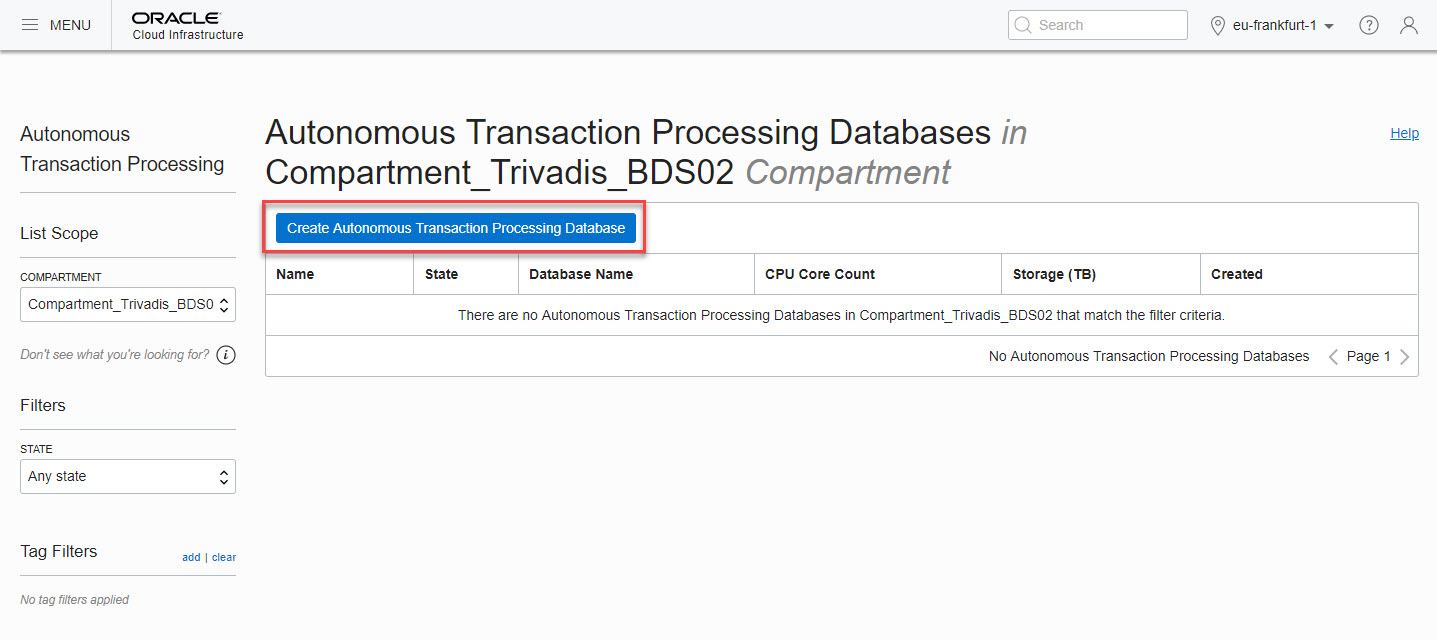
Login into Oracle Cloud Infrastructure in ATP menu and click on the “Create Autonomous Transaction Processing Database” button.
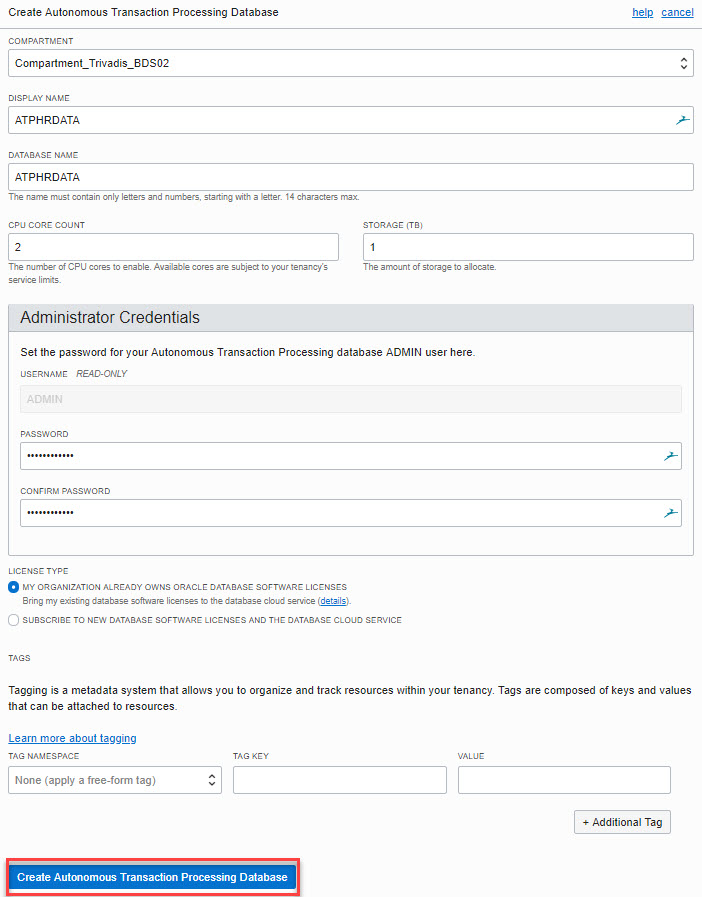
Set DISPLAY NAME, DATABASE NAME, CPU CORE COUNT, STORAGE and set the Administrator Credentials. These credentials are used later to manage the Autonomous Transaction Processing database. Verify your license situation and click on the “Create Autonomous Transaction Processing Database” button.
My ATP database is called ATPHRDATA, it contains later data from schema HR.
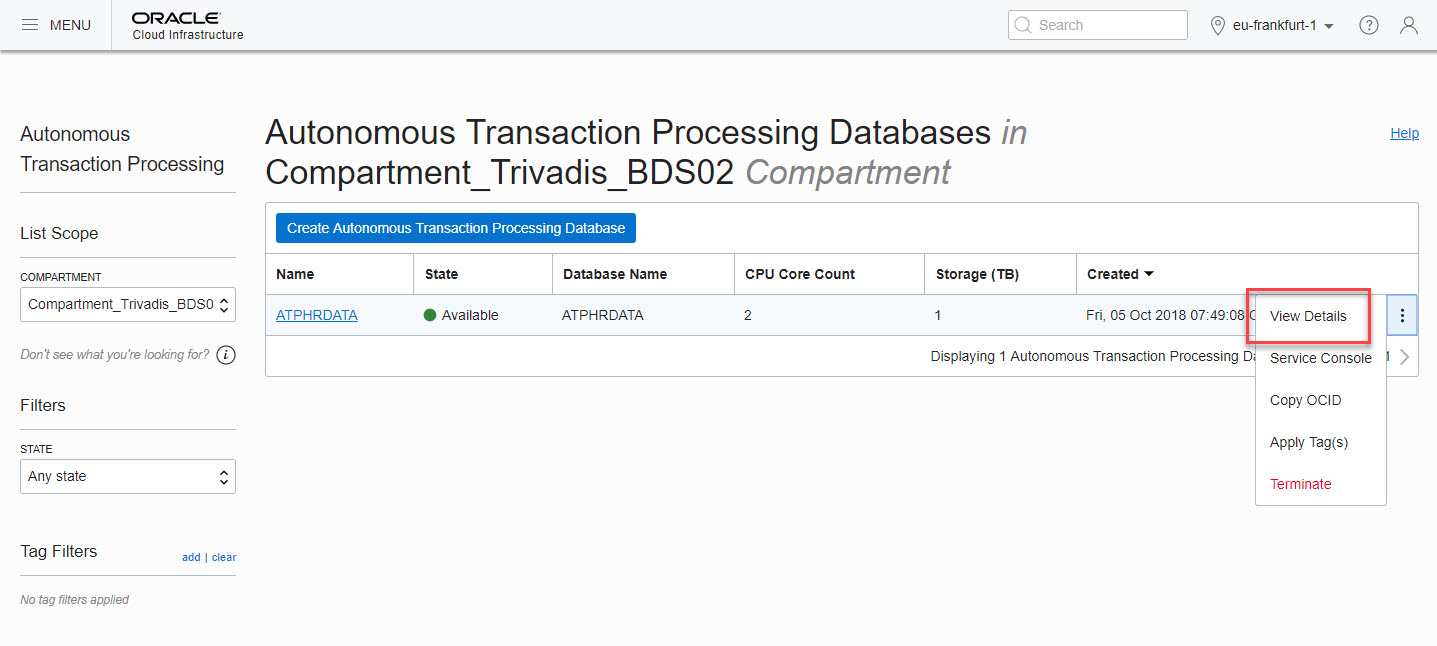
Some minutes later, the database has state AVAILABLE and is ready to use. Click on the ATP database name link or the “three bullets” on the right side to view the details.
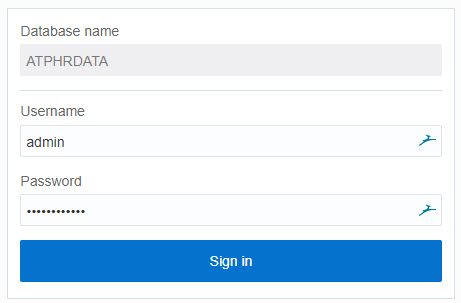
Click on “Service Console”.

Enter admin as username the password from the creation step. Click on “Sign In”.
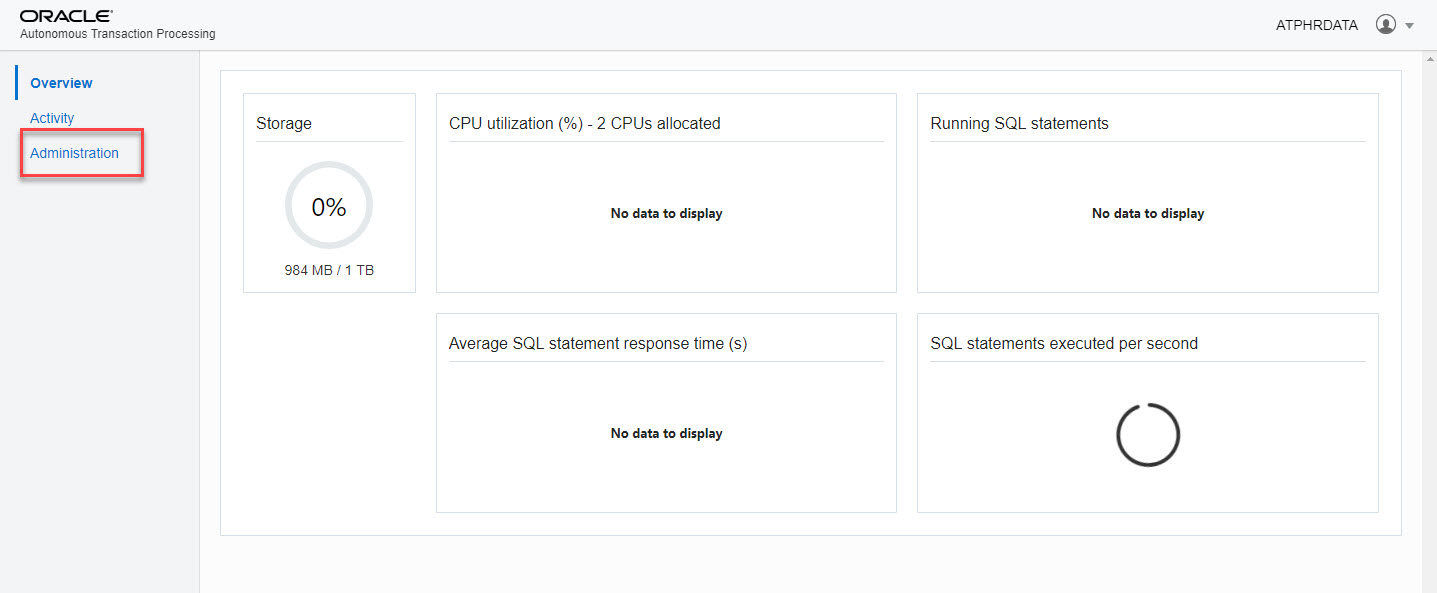
This is the ATP main dashboard. Here you can manage the ATP database. Click on the “Adminstration” link.
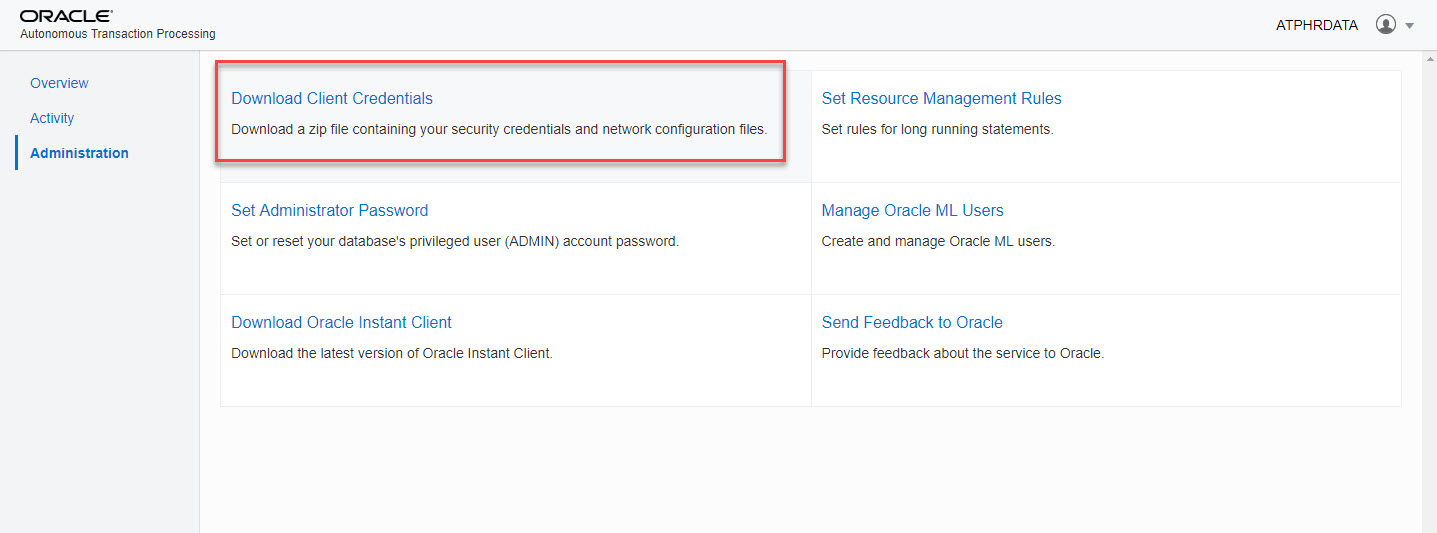
Download the login credentials by click on the “Download Client Credentials” link . ATP uses a SSL encrypted connection. The provided zip file contains all required files and configurations to connect a client by OCI, ODBC or JDBC with the Autonomous Transaction Processing Database. You have to protect this file to prevent unauthorized database access by a password.
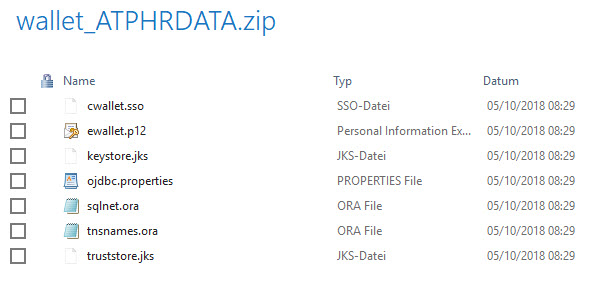
The Client Credential Package
Content of the extracted “Client Credentials” package, it will used later for the connection configuration and verification. This file can also be used to configure a connection to the database with the Oracle SQL Developer 17.4 or later.
Oracle Instant Client
Download the newest Oracle Instant Client by click on the “Download Oracle Instant Client”. Older clients than 12.2 do not support ATP connections.

In my example, I use the 18c “Instant Client Downloads for Microsoft Windows (x64)” and the additional package with the SQL*Plus and Oracle Data Pump components.

Client Setup
To verify the connection, I have installed the Oracle Instant Client from above and configured the Windows environment like this:
| Oracle Instant Client Installation Directory | C:\oracle\product\instantclient_18_3 |
| TNS_ADMIN which contains the extracted ATP database credentials / wallet | C:\oracle\network\admin |
The sqlnet.ora file which is provided by Oracle ATP has to be modified to the real location of the configuration files. If your TNS_ADMIN is not located in a subdirectory of your ORACE_HOME, change the directory path to the wallet from
WALLET_LOCATION = (SOURCE = (METHOD = file) (METHOD_DATA = (DIRECTORY="?/network/admin")))
SSL_SERVER_DN_MATCH=yes
to your TNS_ADMIN path:
WALLET_LOCATION = (SOURCE = (METHOD = file) (METHOD_DATA = (DIRECTORY="C:\oracle\network\admin")))
SSL_SERVER_DN_MATCH=yes
If the path is not set correctly, you will get an ORA-28759: failure to open file error.
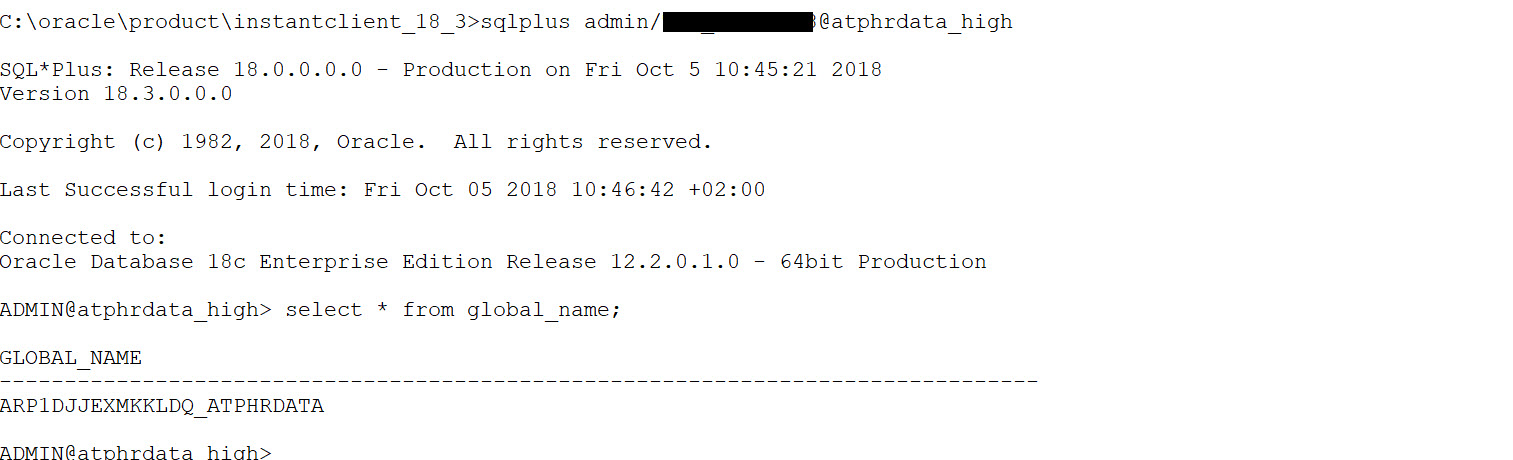
Connection Verification by SQL*Plus
SQL*Plus Connection Test with the user admin – the TNS alias is from the provided tnsnames.ora.
Links
docs.oracle.com – https://docs.oracle.com/en/cloud/paas/atp-cloud/index.html
ATP User Guide – https://docs.oracle.com/en/cloud/paas/atp-cloud/atpug/using-oracle-autonomous-transaction-processing.pdf
ATP Introduction – http://www.oracle.com/us/products/database/atp-brief-5029003.pdf
Summary of Part 1
Now the autonomous database is ready to use, the client connection works fine. The next steps are to export the on-premises data and import them into the Autonomous Transaction Processing Database.